Schedules
- Click Schedule, then click Schedules in the main menu.
- Just above the schedule listing, click the calendar icon and choose the Date that you want to display.
- Click the Day, Week, Month, or Year buttons to change the listing display.
- To print the displayed schedule, click the Print button.

- Click on the settings button
 and then the appropriate check boxes to enable or disable Daily Totals, Weekly Totals, Show Unscheduled Employees or Strict Range.
![]()
- Click on any cell in the table to see available options on the button bar that can be performed on the employee's schedule.
See the Basic Operation section for details on viewing, adding, editing and deleting.
Schedule Drag & Drop Options
To move shifts directly on the schedule grid:
- Select one or more shifts on the schedule.
- On the button bar, open Drag & Drop.
- Choose one mode: Move, Copy, or Swap. Only one mode can be active at a time.
- Optionally enable Overwrite and Notify Employee.
- Drag the selected shift or shifts to the destination date or employee cell.
| OPTION | DESCRIPTION |
|---|---|
| Move | Moves the selected shift or shifts to the new date or employee and removes the original committed shift from the original location. |
| Copy | Creates a new shift at the destination and leaves the original shift unchanged. |
| Swap | Exchanges the selected shift with an existing shift in the destination cell. Use this when two existing shifts need to trade places. |
| Overwrite | When used with Move or Copy, replaces conflicting shifts at the destination so the change can be saved. Without Overwrite, overlapping shifts for the same employee are rejected as conflicts. |
| Notify Employee | When used with Move or Copy, sends a schedule change notification for affected assigned employees when the new shift is saved. Open shifts are not notified, and notifications are sent only for future shifts. |
|
||||||||||||||||||||||||||||||||||||||||||||
Editing Scheduled Shifts
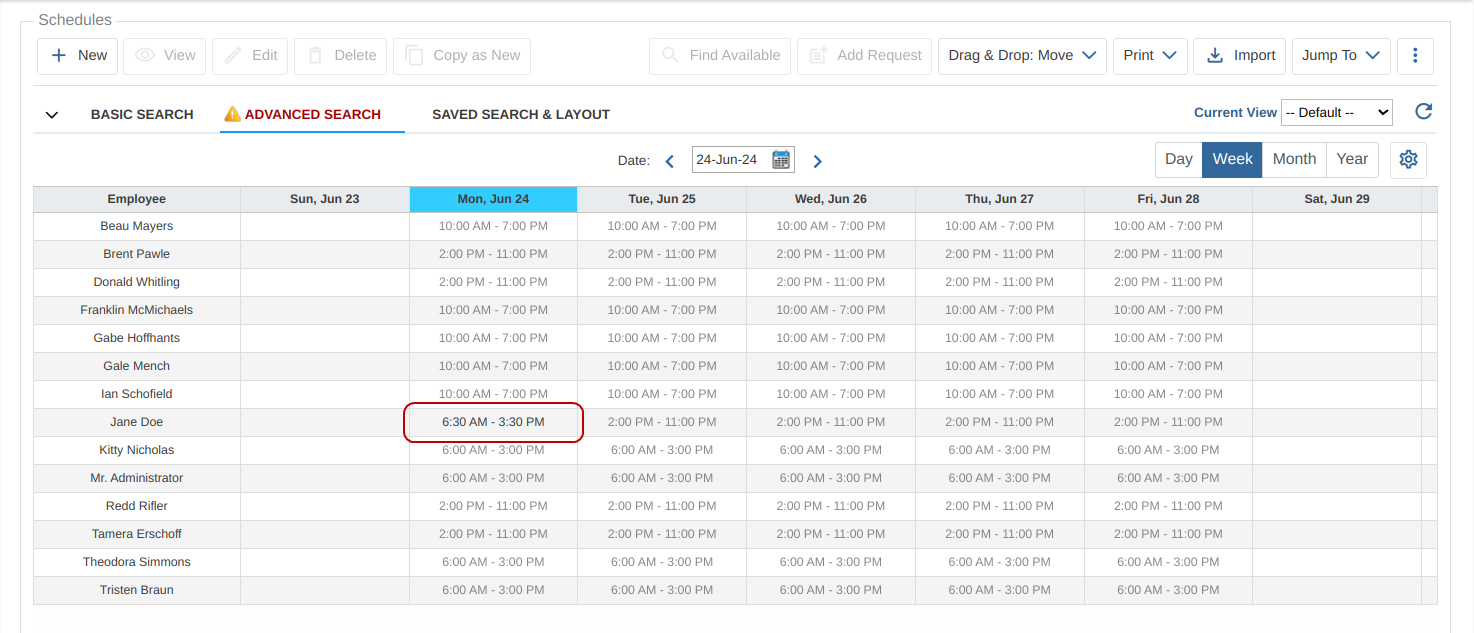
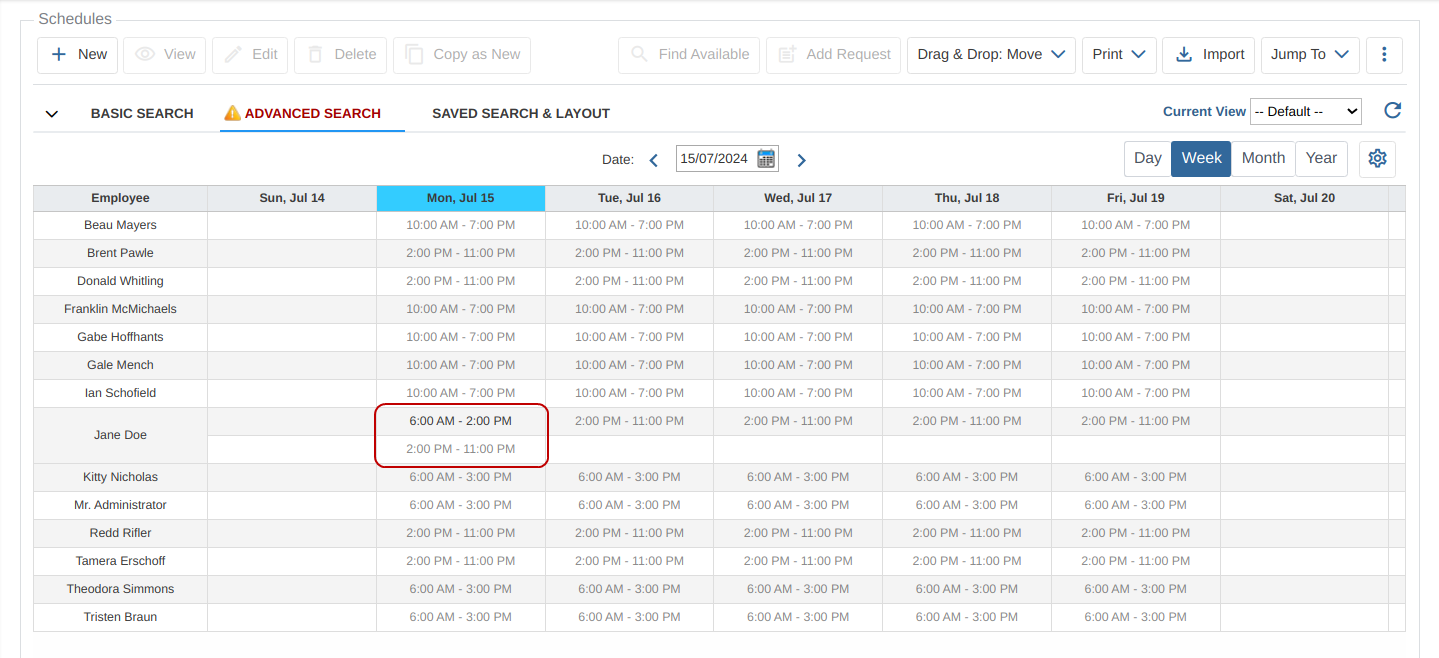
Scenario: An employee originally scheduled to work a recurring afternoon shift is now working a morning shift on a particular day. (Refer to the image below.)
A. Overlapping shifts:
If the new morning shift time overlaps with the recurring afternoon shift: e.g. 6:30AM-2:30PM & 2:00PM-11:00PM. (Refer to the image below.)
-
Edit the shift times and other relevant fields for the recurring shift.
B. Non-overlapping shifts:
If there is no overlap in time between the two shifts: e.g. 6:00AM-2:00PM, 2:00PM-11:00 PM
-
Select the employee's recurring scheduled shift for the day you want to modify.
-
Add a New schedule for the morning shift. The new shift is a committed shift and will appear in black text. (Refer to the image below).
-
The new shift and the recurring shift will both appear now, so to remove the recurring shift, select it and click the Delete button.
-
Or to choose a specific absence policy, Edit the recurring shift by setting the Status to Absent and selecting an Absence Policy. If an Absence Policy is selected, such as 'Day Off' or 'Vacation' it will be displayed on the schedule, otherwise 'N/A' in red text will be displayed. (Refer to the image below).

Editing the Schedule Policy for a Shift
Scenario: If an employee is scheduled for a lunch break, but does not take one on that day.
- Select the employee's scheduled shift you want to modify.
- Edit the scheduled shift by changing the Schedule Policy to None. This will turn off an auto-deduct lunch policy for that day only.
Auto-Punch
To automatically punch in/out based on an employee's schedule, follow these steps:
-
Select one or more scheduled shifts.
-
Click the three-dot More button
 .
. -
Choose Auto-Punch.
TimeTrex will then handle the punching in/out for the selected employees according to their schedule.
Find Available
To see employees who are available to cover a shift:
-
Select a specific shift.
-
Click Find Available in the button bar to display a list of employees available.
-
A list of employees who are free to fill the available shift will appear. You can filter, search and sort this list by different fields such as hire date, number of hours scheduled this week or last week.